Appendix - SSO with IIS on Windows
Enable Windows Authentication
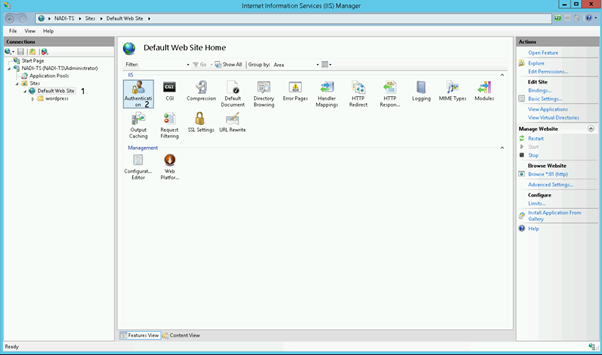
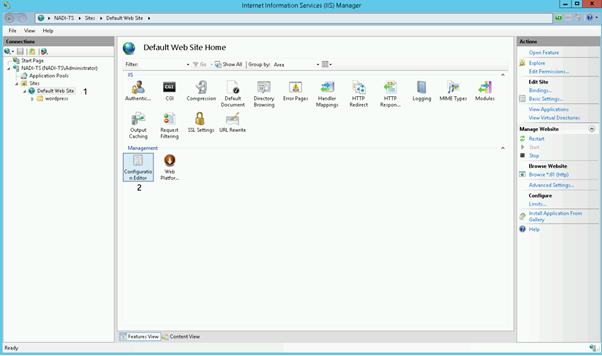
Open the IIS Manager and select the site under which your WordPress environment runs. In our case we use the "Default Web Site".
After that double click "Authentication"
Now you have to configure the authentication settings of your site.
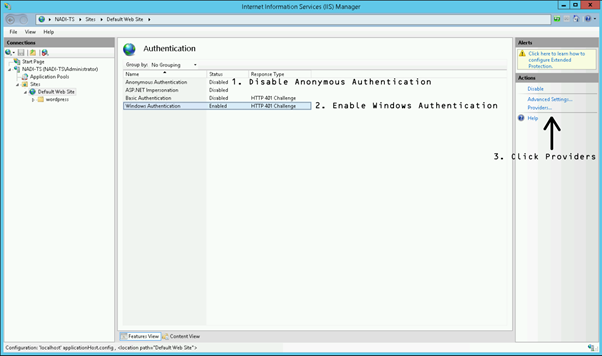
Disable Anonymous Authentication
Enable Windows Authentication
With Windows Authentication selected, click on the Providers link in the right Action panel
Now the following window should appear. Please add the providers as shown in the picture. The order has to be Negotiate over NTLM!
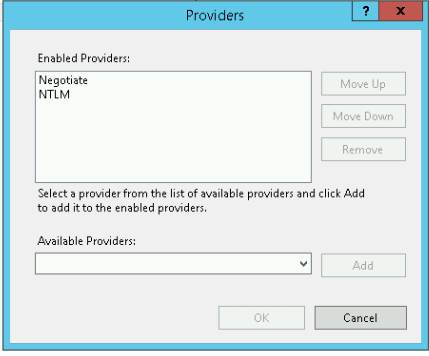
After that close the window by pressing OK.
For the next step please select your site on the left panel
After that double click the Configuration Editor
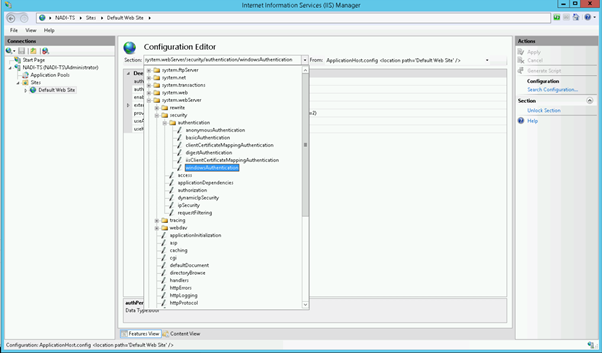
Now please select *windowsAuthentication* from the dropdown menu
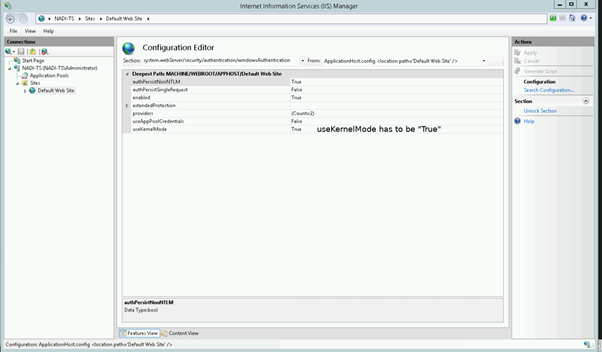
Please change *useKernelMode* to *True* and save the settings by
pressing *Apply* button in the upper right corner.
At last please restart your IIS.
Configure SPNs
In our example we imagine the following scenario
| Hostname | Domain | FQDN hostname |
|---|---|---|
| nadi-ts | test.ad | nadi-ts.test.ad |
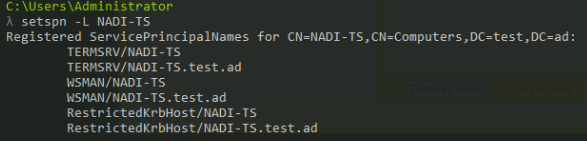
Open a console and type hostname in order to see the hostname of your machine.
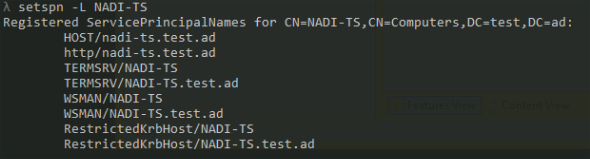
Now type the following to receive a list of all SPNs registered for your machine
setspn -L yourMachineName
This should output a list like
You now have to add a HOST and a http SPN for the address of your WordPress environment which has to equal the hostname. To do this type the following commands:
setspn -a HOST/yourHostName yourMachineName
setspn -a http/yourHostName yourMachineName
Check if the SPNs were added successfully by typing
setspn -L yourMachineName
If your hostname contains a port (e.g. *nadi-ts.test.ad:81/wordpress*) do __not__ add the port to the SPNs. This is only required for older environments up to Windows 7 and Windows Server 2008.
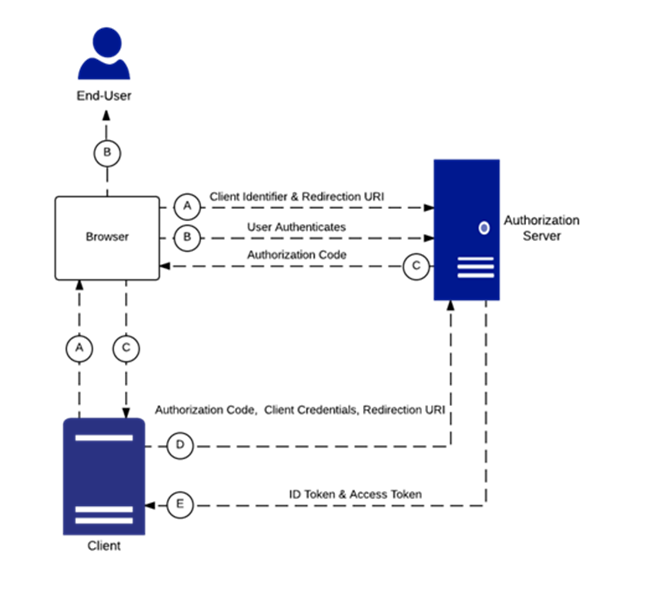
Browser = UPV
Client = abgesicherter Ort wo das Model liegt (z.B. bei BP -> Azure App Proxy)
Authorization Server = Server, der die AccessTokens ausstellt (z.B. bei BP -> Microsoft Azure Server)