Advanced integration options
There are multiple flexible options to combine your product with the UPV WebServices.
You can find code examples at: https://github.com/caxperts/upv-webservices-integration
Authentication
For specific use-cases it is possible to directly handle the OpenID Connect authentication and use its multitude of options directly.
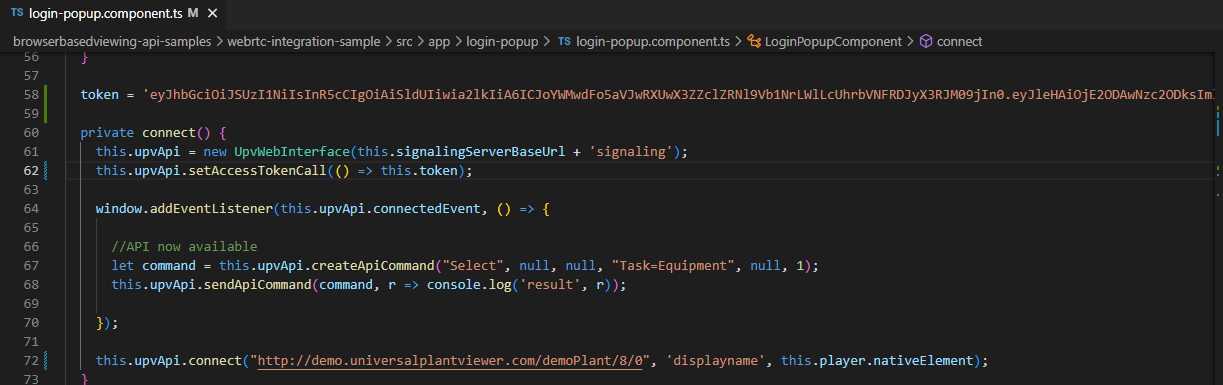
The BBV WebRTC integration package supports directly setting an access token without using the integrated automatic login. This is demonstrated here in the login-popup flow: https://github.com/caxperts/upv-webservices-integration/tree/main/browserbasedviewing-api-samples/webrtc-integration-sample By calling setAccessTokenCall, you can pass the token directly. The original part of the sample regarding popups and account handling is not required for this use case. Please note that the token must be updated in case the token is expired. The JWT token has a lifetime property.
Using this approach it is possible to highly customize the product.
Example: Service accounts
By utilizing keycloaks service accounts it is possible to request a specific user authentication without the regular user login flow. This is commonly used for machine-to-machine scenarios.
An access token can be obtained using the standard OpenID Connect “Client Credentials Grant” flow.
Access control
Clients using the “Client Credentials Grant” will automatically have a service account user created in Keycloak. In this case, for the client “example-client” a user named “service-account-example-client” is created.

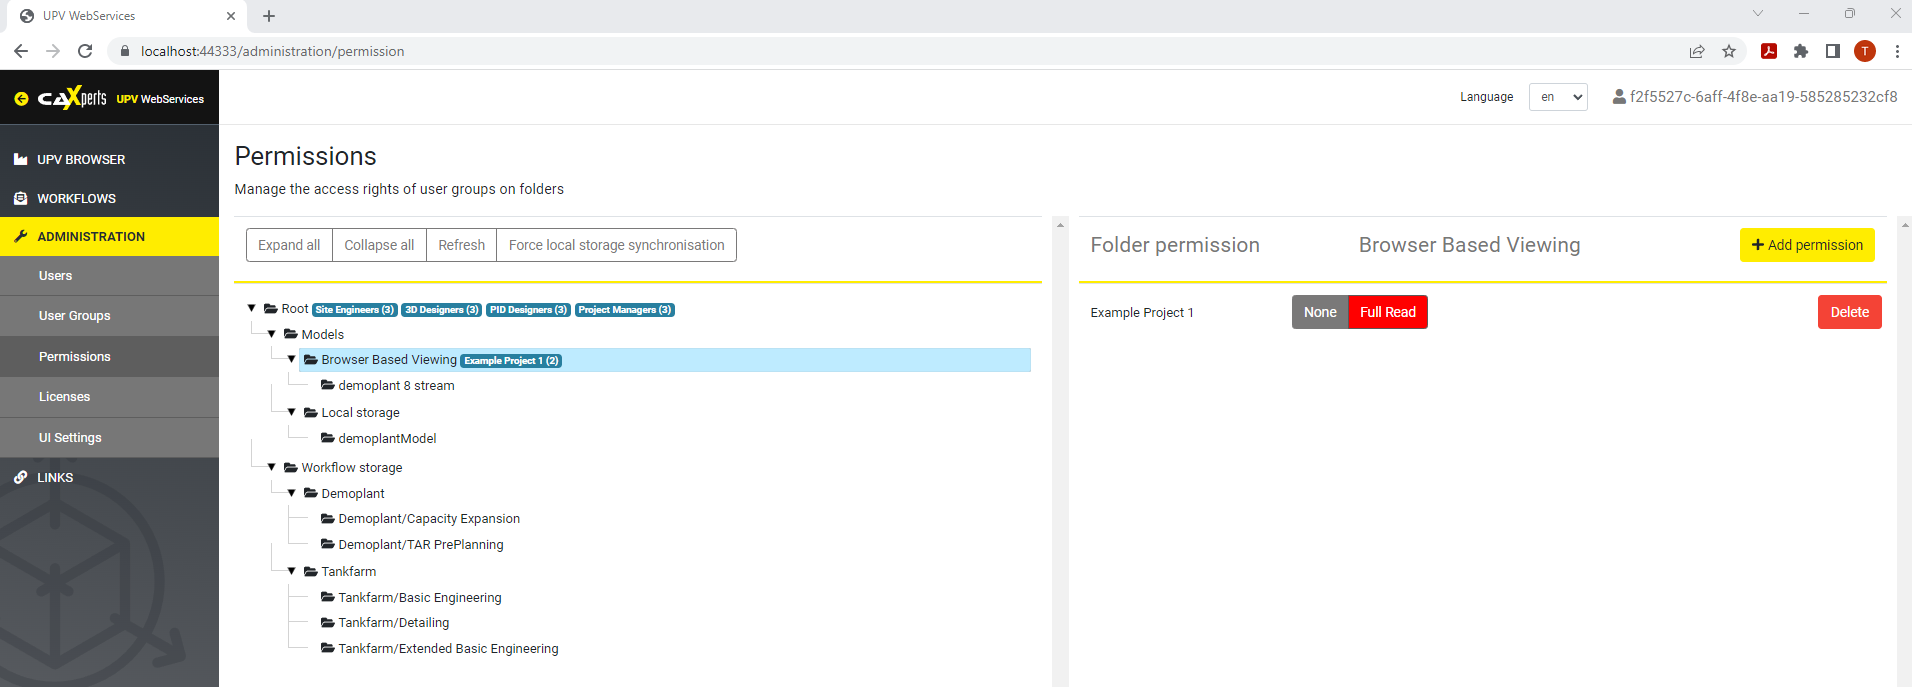
After calling “ForceSynchronize” on the UWS application side this account is available in the UWS admin UI as well. Here you can configure the fine grained access rights for the account.

The user group can be assigned the permission on specific models.
How to create a service account
- Open the keycloak URL
- Go to “Administration Console”
- Log in using a keycloak admin account (when not self-hosting the keycloak server, contact your hosting provider to provide an admin account for you)
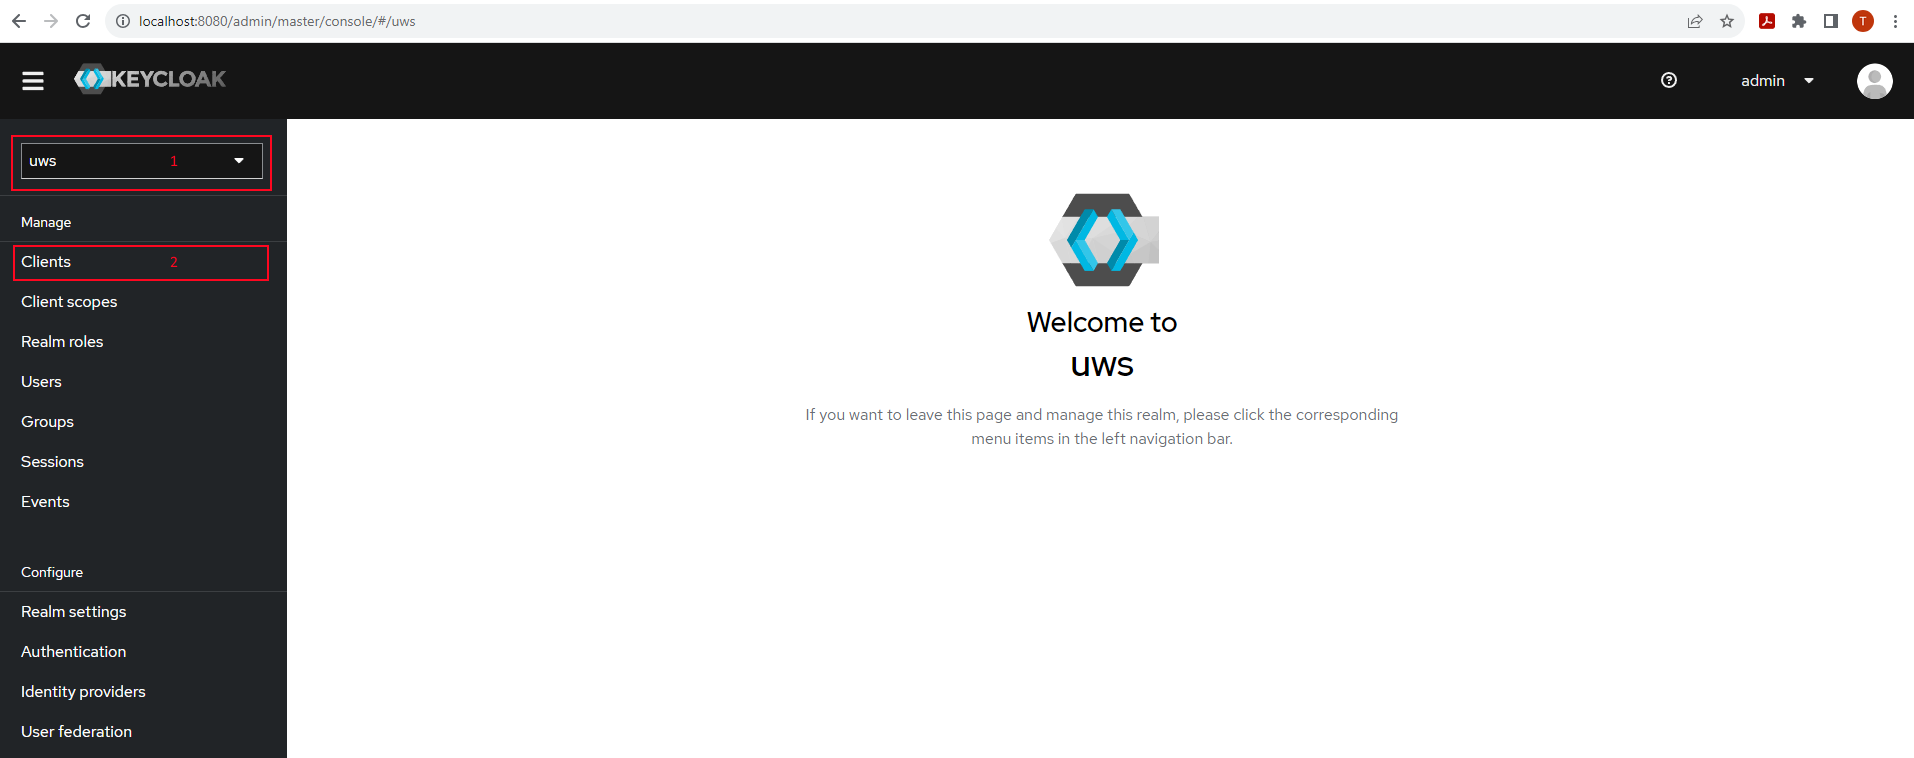
- Make sure your application realm is selected. The default name of the application realm is “uws”. The “master” realm is never to be used. When using a hosting provider, this might be named differently.
- Go to “Clients” in the left menu - Service accounts are directly associated with a OpenID Connect client entry
- “Create client”
- Choose “Client ID” freely and hit next
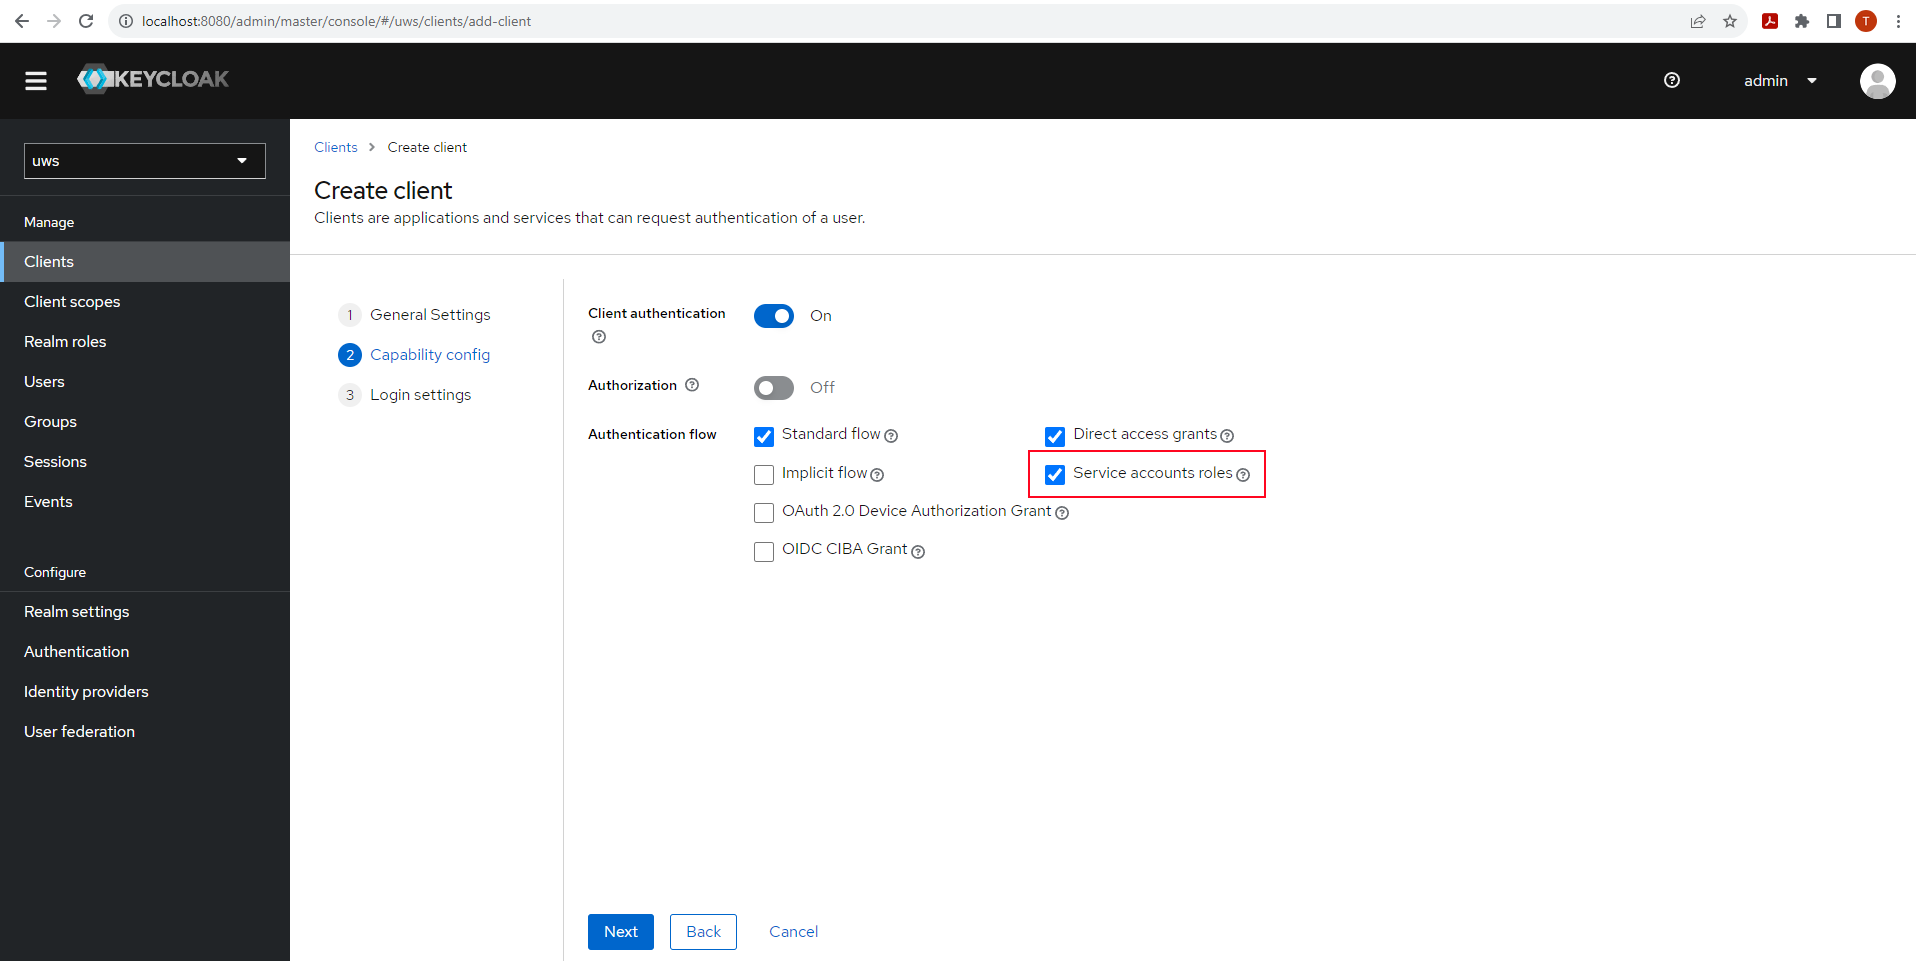
- See above picture for the default setting required. It is important to enable “Service accounts roles”. This setting is responsible for associating a new service account with the client. You can of course alter this if you have specific authentication needs.
- Hit next
- Leave “Login settings” unchanged and save
- The client will automatically receive a client secret (password). You can access it at the “Credentials” tab of the client.
- The generated keycloak service account can be viewed in the client page. It is located at the “Service accounts roles” tab.