Setup
Requirements
For installation you will need the following:
- an alias/(sub)domain for the server
- a trusted certificate for that alias or (sub)domain with current security standarts installed to the windows certificate store
- Servers should have an accurate time (NTP)
- It is recommended to use a SQL Server. An SQL Server Express can be installed during the main installation. The sa user is needed
- SMTP credentials in case Emails should be send
- IIS Installation with the default website being reachable via HTTPS
- For BBV a TURN/STUN server can be required depending on your local network
- The Render server requires a logged in user. (The screen can be locked)
Installation
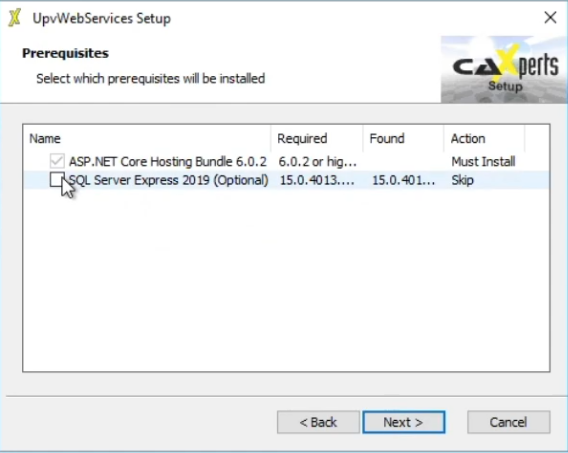
In case an SQL Server is available deselect the SQL Server Express Installation. It is also possible to use an SQLite database but this is discouradged. Click afterwards on Next.
Click on Next.
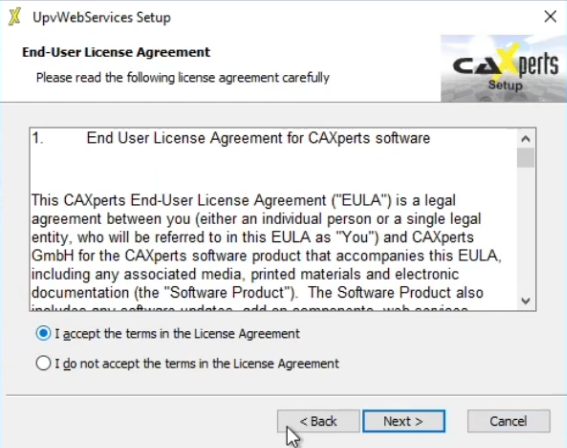
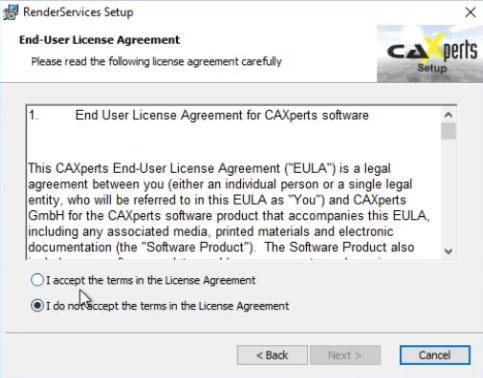
For installation you need to accept the EULA and click Next.
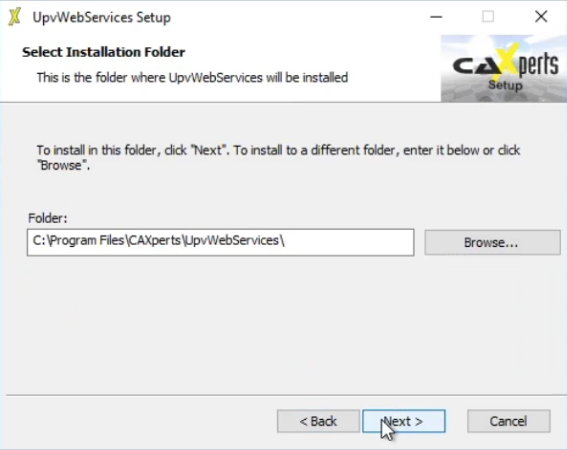
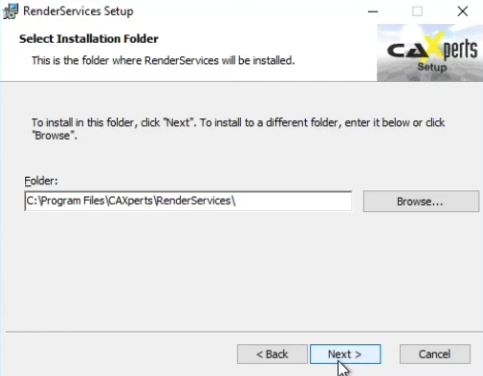
Chose a suitable installation path and click on Next.
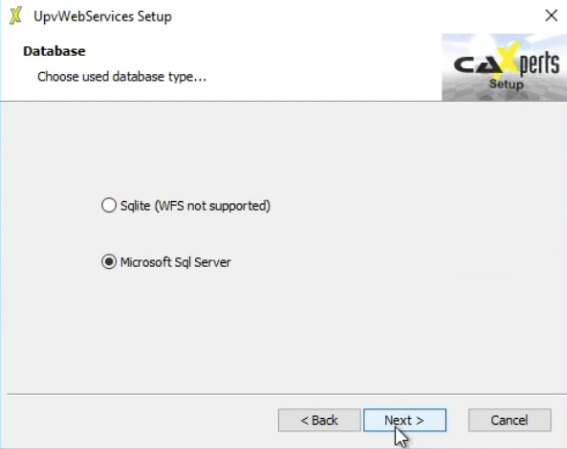
Select which type of Database you want to use. If you have SQL Server or SQL Server Express installed selected Microsoft SQL Server and click Next.
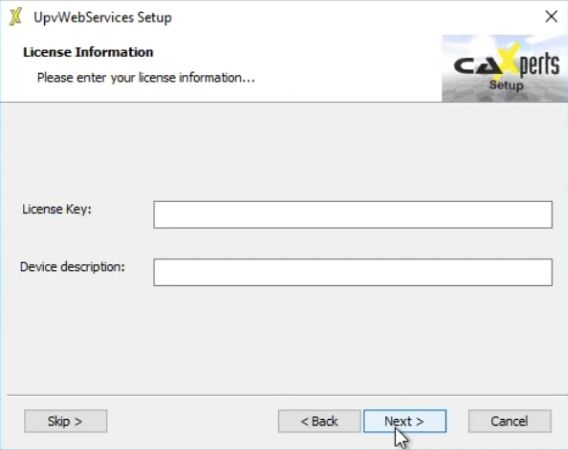
Enter the Licensekey provided to you and a client description and click on Next.
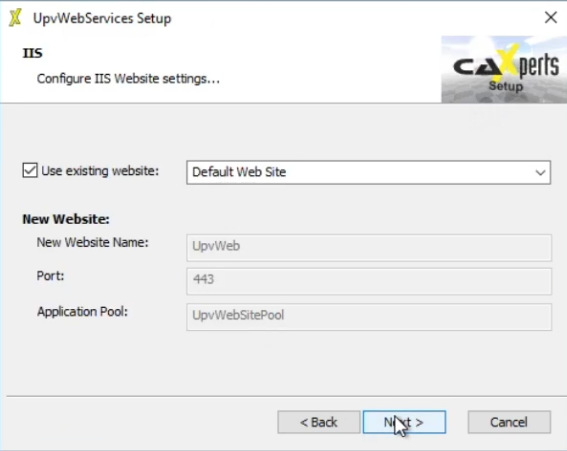
Choose an existing IIS website or create a new one. In most cases using the default website is recommended. Click on Next.
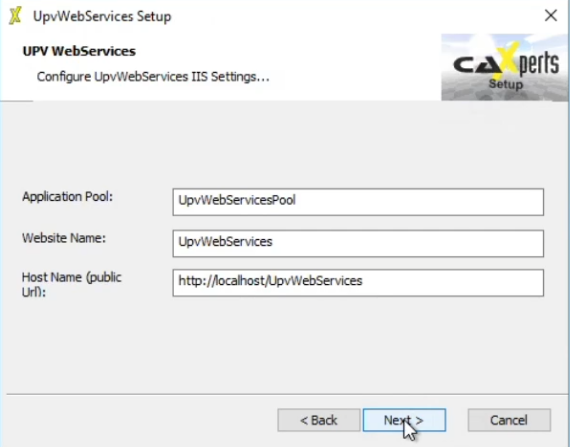
The only setting that needs to be changed is the Hostname. This should be https://<alias/(sub)domain>/UpvWebServices.
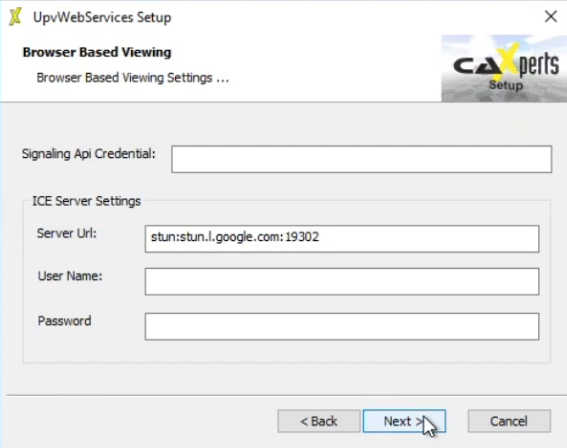
If you intend to use Browser based viewing you need to enter a shared secred that is used between the Renderserver(s) and the Web Service. Enter this shared secret into Aignaling API Credentials.
Depending on if you use Browser Based Viewing and a TURN or STUN server you need to configure it in here
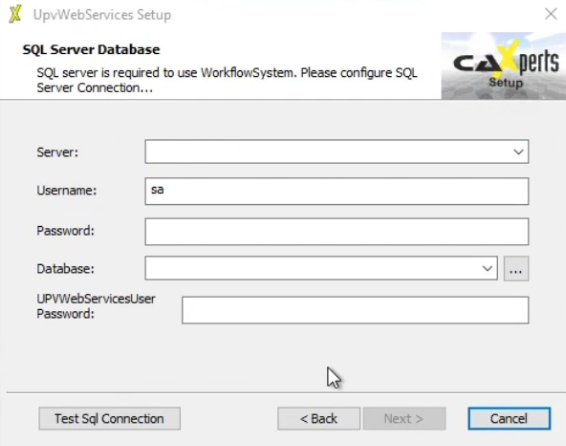
Configure the SQL Server connection. Enter the server address, the superadmin username and password
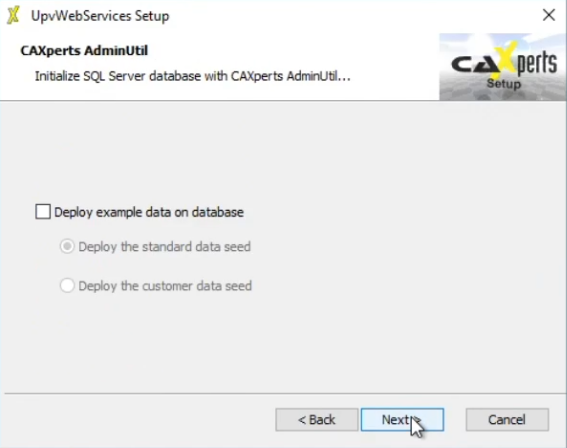
Dont deploy example Data
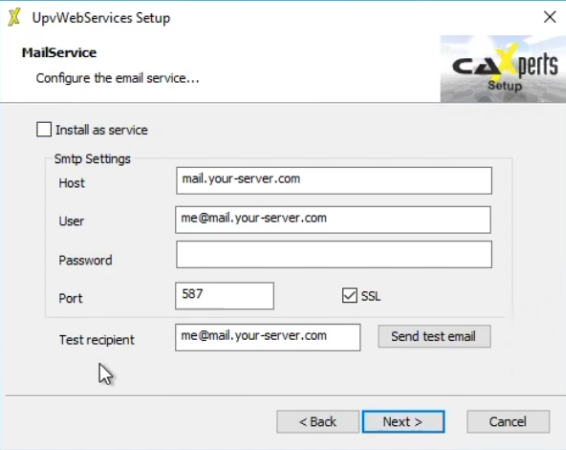
If you will use Email support you can setup the connection here.
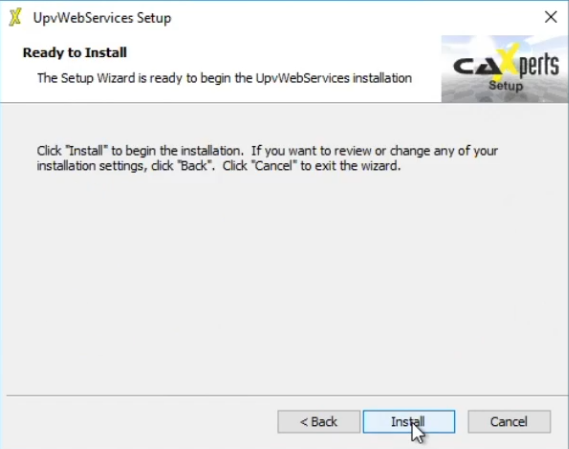
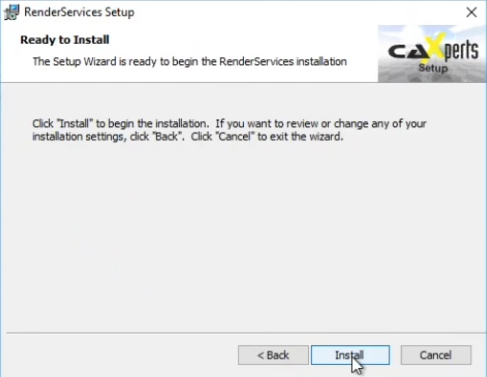
To start the installation click on Install
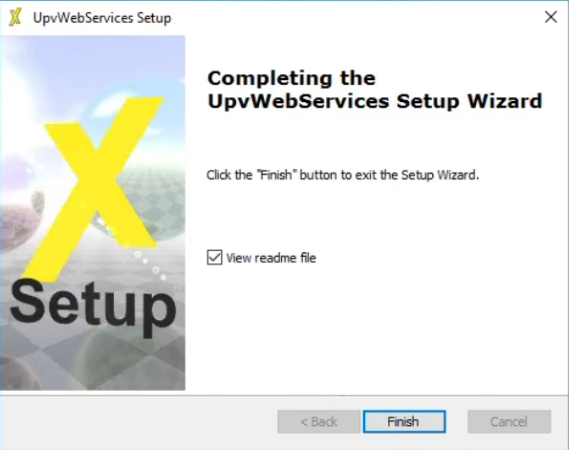
After the installation is finished click on Finish
Accessing Webservices
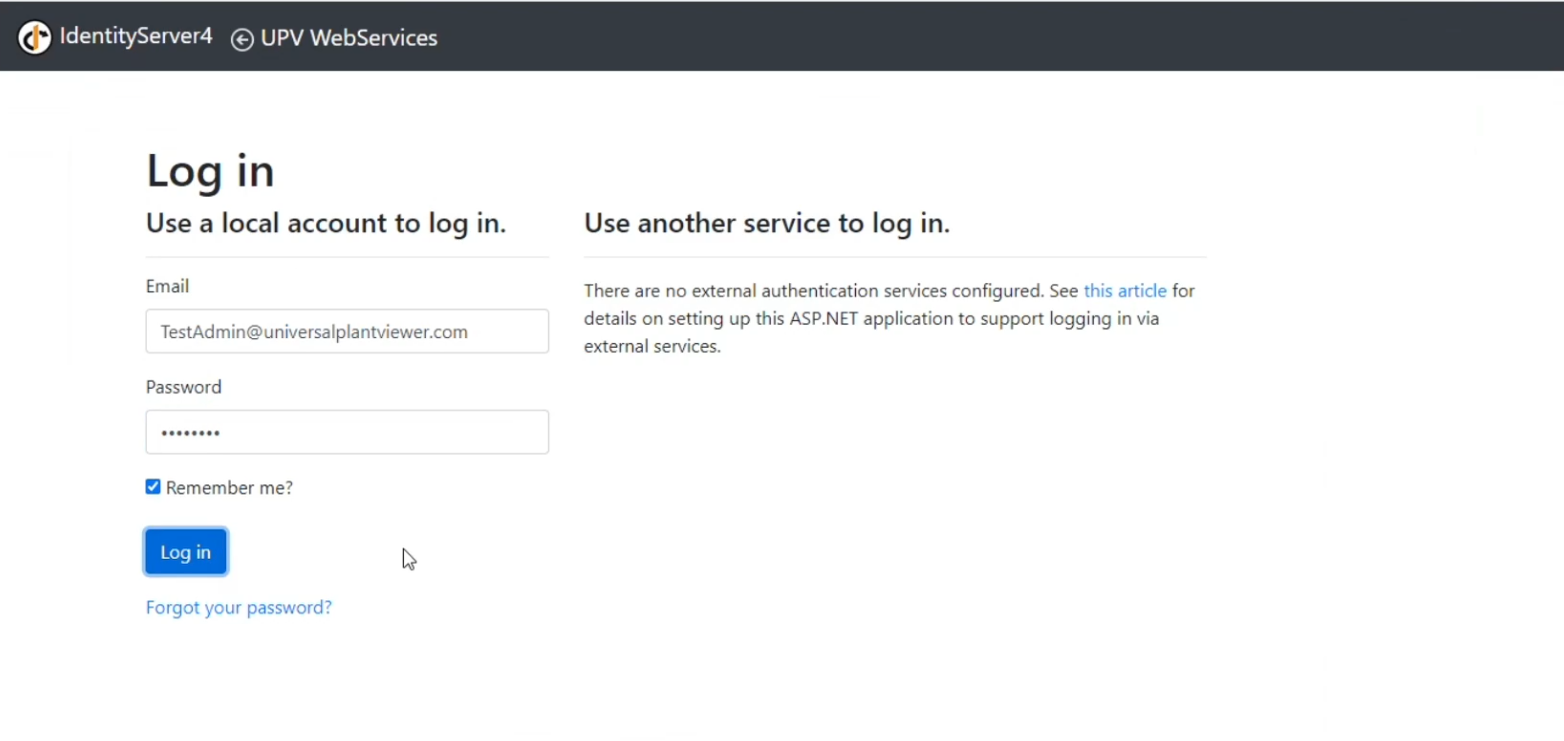
Goto https://<alias/(sub)domain>/UpvWebServices and login via TestAdmin@universalplantviewer.com and Pass123$
These default credentials can be changed afterwards in the user settings or after creating a new admin accound disabled
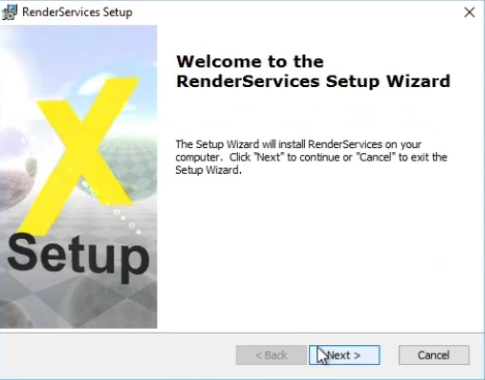
Renderservice
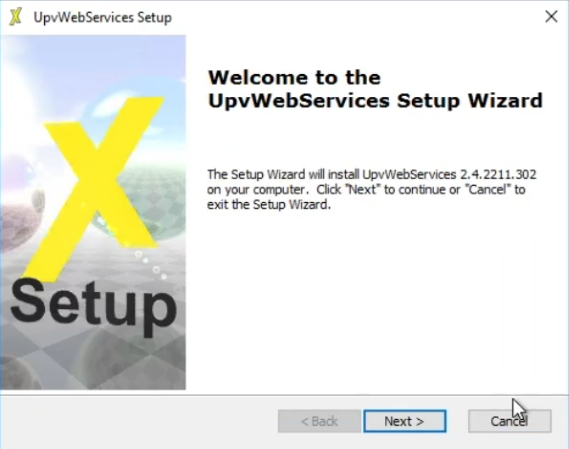
Click on Next.
For installation you need to accept the EULA and click Next.
Enter a install location or use the default one.
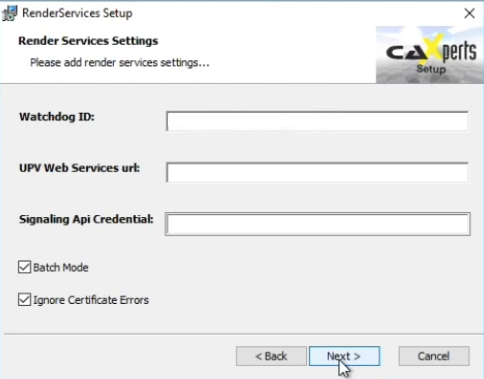
Enter a name for the Watchdog to later identify it. Next enter the UPV Webservice URL https://<alias/(sub)domain>/UpvWebServices and enter the shared secret specified during the WebServer installation. If batch mode is enabled no UPV windows will be shown during excution. With ignore certificate errors also invalid certificates from the webservices will be accepted.
Start the installation by clicking Install
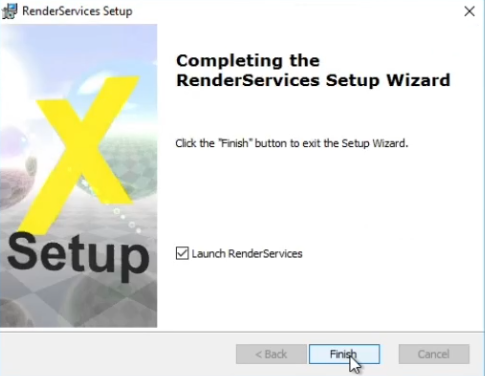
Click on finish to start the installation. if the check box is set it will automatically start the render server.
Security
As with every web server, we recommend to keep it updated with the newest security fixes. Here are some additional hints how to improve the security:
- On the Keycloak servers, after installing or updating Java, we recommend to raise keysizes to a minimum of 2048, e.g. by modifying Java_home.security
For example: jdk.tls.disabledAlgorithms=SSLv3, TLSv1, TLSv1.1, RC4,
DES, MD5withRSA,
DH keySize < 2048, EC keySize < 224,
3DES_EDE_CBC, anon, NULL
- Switch of “outdated/unsecure” services like FTP or legacy TLS