Introduction
How to host UniversalPlantViewer projects
Prerequisites
Software
- OS: Windows Server 2016 (or newer)
- IIS or Apache
IIS is recommended as it is needed for user authentication: only “Basic Authentication” is supported (i.e. Form or Windows integrated authentication are not supported; set user and group rights on the local Windows machine as usual).
Hardware
- CPU: 4 cores, 2 GHz (8 Cores, 3 GHz)
- RAM: 8GB (16GB)
- Storage: HDD (SSD)
- Network: GBit
Other
(Valid SSL certificate for access via https)
How to install IIS 7.5
IIS is one of the Windows Server® server roles. IIS can be installed through the graphical user interface (GUI) by using the new Server Manager interface after the Windows Server operating system is installed.
Server Manager provides a single dashboard to install or uninstall server roles and features. Server Manager also gives an overview of all currently installed roles and features. When IIS is chosen from the Server Manager, the basic components and services needed for IIS are automatically selected.
1. Click Start -> All Programs -> Administrative Tools -> Server Manager.
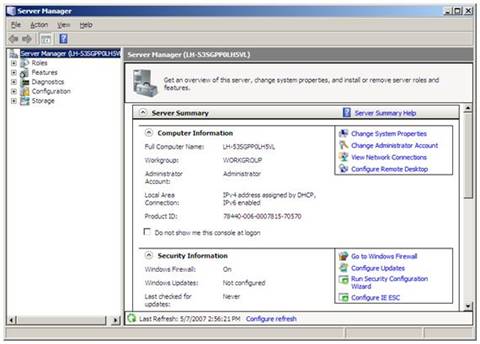
Figure 1: Server Manager
2. In the Server Manager window, scroll down to Roles Summary, and then click Add Roles. The Add Roles Wizard will start with a Before You Begin page. The wizard asks for verification of the following:
a. The administrator account has a strong password.
b. The network settings, such as IP addresses, are configured.
3. Select Web Server (IIS) on the Select Server Roles page. An introductory page will open with links for further information.
![]() When you use the Add Roles Wizard to install IIS, you
get the default installation, which has a minimum set of role services.
If you need additional IIS role services, such as Application
Development or Health and Diagnostics, make
sure to select the check boxes associated with those features in the
Select Role Services page of the wizard.
When you use the Add Roles Wizard to install IIS, you
get the default installation, which has a minimum set of role services.
If you need additional IIS role services, such as Application
Development or Health and Diagnostics, make
sure to select the check boxes associated with those features in the
Select Role Services page of the wizard.
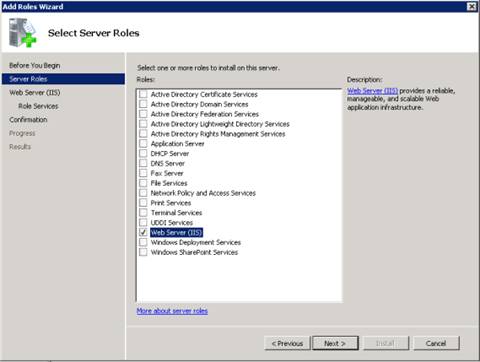
Figure 2: Select Server Roles
4. Select the IIS services to be installed on the Select Role Services page. Add only the modules necessary. In this case, Basic Authentication. Once desired modules are added, click Next.
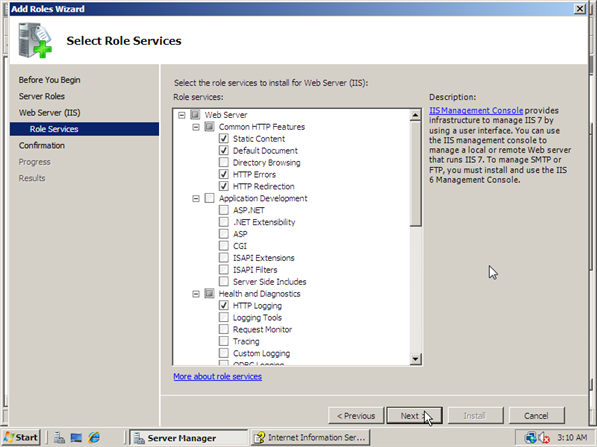
Figure 3: Select Role Services
5. Add any required role services.
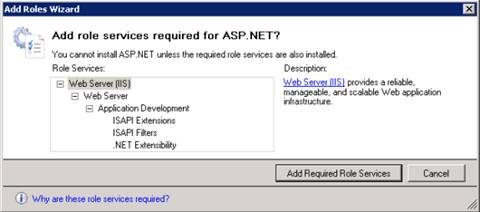
Figure 4: Wizard warning page
6. IIS is now installed with a default configuration for hosting ASP.NET on Windows Server. Click Close to complete the process.
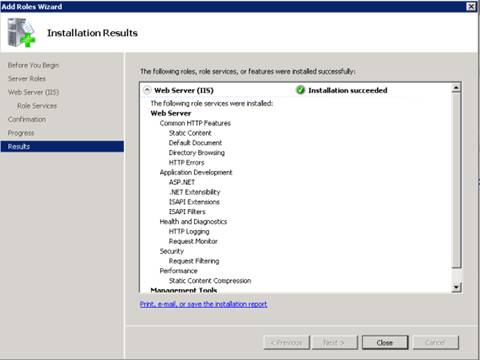
Figure 5: Installation Results page
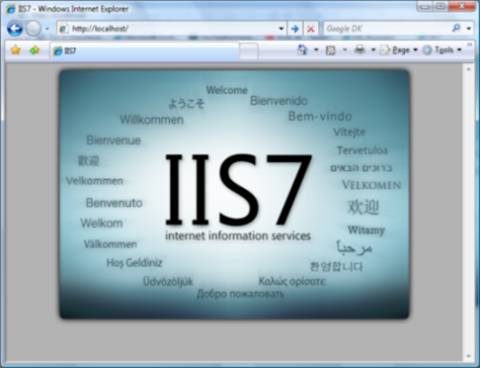
7. Confirm that the Web server works by using http://localhost.
To open port 80 on Windows Server 2008 R2
From the Start menu, click Control Panel, click System and Security, and then click Windows Firewall. Control Panel is not configured for ‘Category’ view, you only need to select Windows Firewall.
Click Advanced Settings.
Click Inbound Rules.
Click New Rule in the Actions window (upper right corner).
Click Rule Type of Port.
Click Next.
On the Protocol and Ports page click TCP.
Select Specific Local Ports and type a value of 80.
Click Next.
On the Action page click Allow the connection.
Click Next.
On the Profile page I am leaving Domain turned on and turning off private and public. You should check the appropriate options for your environment.
Click Next.
On the Name page enter a name of such as Allow ReportServer (TCP on port 80)
Click Finish.
You may want to repeat the steps to open port 443 if you are using https for anything.
Copying UniversalPlantViewer files to the webserver
On IIS, the UniversalPlantViewer files should be copied to c:\inetpub\www\UPV, also rename the UPV.web.html to index.html
Accessing UPV on the webserver
Navigate to http://ip-address/UPV or http://servername/upv using a browser or the UniversalPlantViewer app.
How to expose the webserver to the internet (optional)
Basic port forwarding
If the computer already has a public IP address then no port forwarding is needed.
If the computer is behind a firewall: You will need to setup port forwarding on the router. Ports to forward: 80. If you use SSL you will also need to forward Port 443. Those ports need to be forwarded to the computer which is running the IIS.
Setting up HTTPS / SSL (optional)
From the Start menu, click Control Panel, click System and Security, and then click Windows Firewall. Control Panel is not configured for ‘Category’ view, you only need to select Windows Firewall.
Click Advanced Settings.
Click Inbound Rules.
Click New Rule in the Actions window (upper right corner).
Click Rule Type of Port.
Click Next.
On the Protocol and Ports page click TCP.
Select Specific Local Ports and type a value of 443.
Click Next.
On the Action page click Allow the connection.
Click Next.
On the Profile page I am leaving Domain turned on and turning off private and public. You should check the appropriate options for your environment.
Click Next.
On the Name page enter a name of such as Allow ReportServer (TCP on port 443)
Click Finish.
Enable basic authentication (optional)
Open the MMC and select the site or directory you wish to protect
Right click and select properties on that site / directory
Select the directory security tab
Click the "edit" button on authentication control
Enable basic authentication
Now your site is setup to support basic authentication you need to change the NTFS permissions for the directory you want to protect and add any users or groups you wish to have access
When IUSR_MACHINENAME does not have access to a directory or you disable anonymous access the basic authentication windows will popup.
Or in IIS Manager:
Choose your Site (Default Site)
>Authentication
> Disable Anonymous Authentication
> Enable Basic Authentication
>.net Authorization Rules
>Add Deny Rules
All users
>Add Allow Rules
Your Windows Group or Windows User
- Click Finish.
SSO with IIS on Windows
Enable Windows Authentication
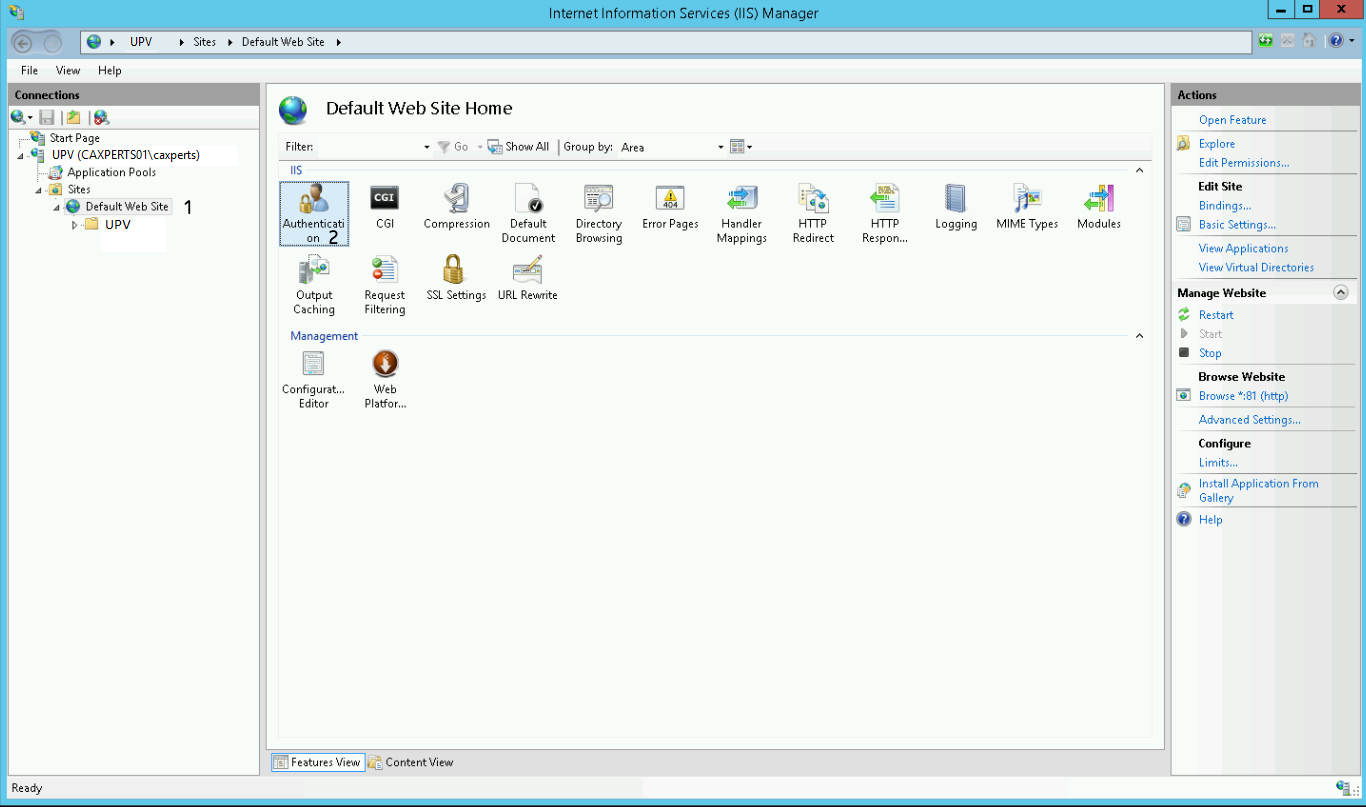
Open the IIS Manager and select the site under which your UPV environment runs. In our case we use the "Default Web Site".
After that double click "Authentication".
Now you have to configure the authentication settings of your site.
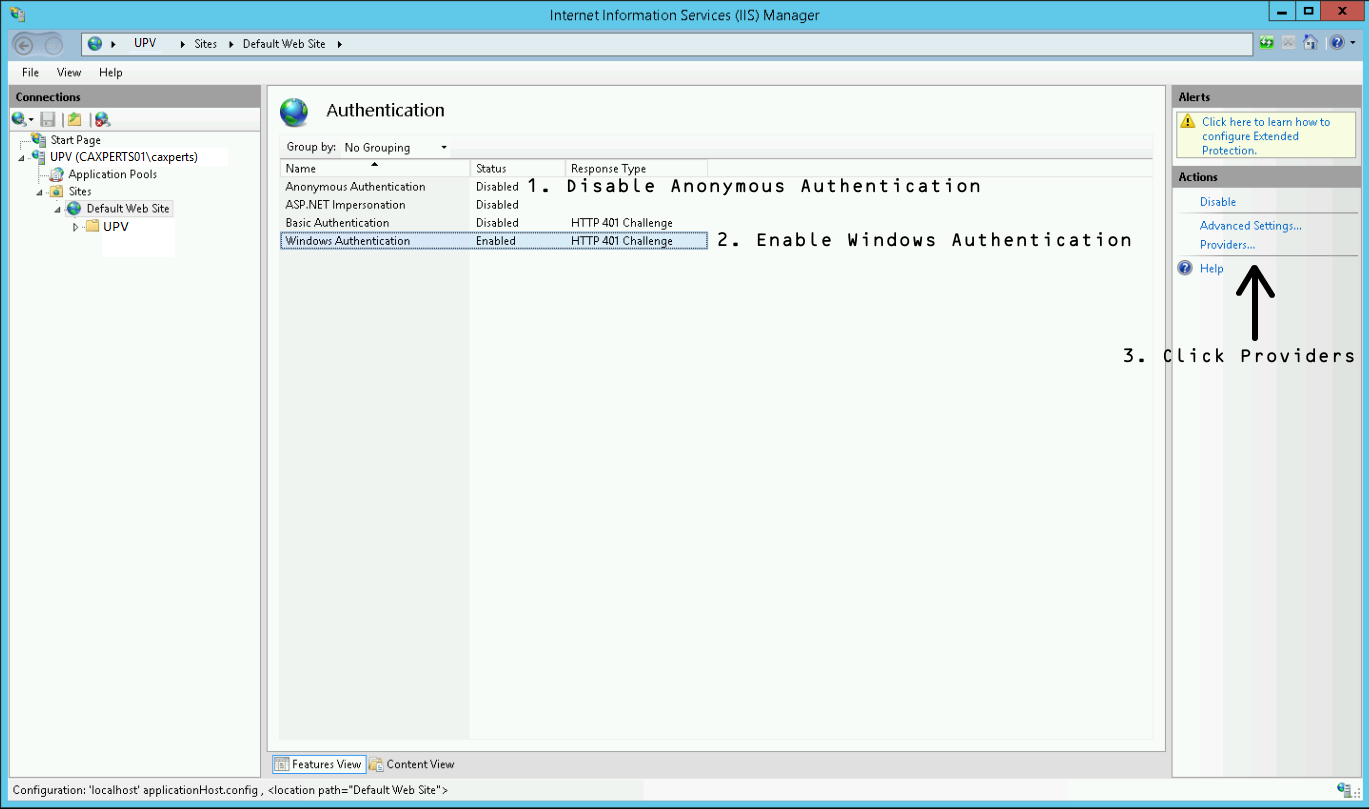
Disable Anonymous Authentication
Enable Windows Authentication
With Windows Authentication selected, click on the Providers link in the right Action panel
Now the following window should appear. Please add the providers as shown in the picture. The order has to be Negotiate over NTLM!
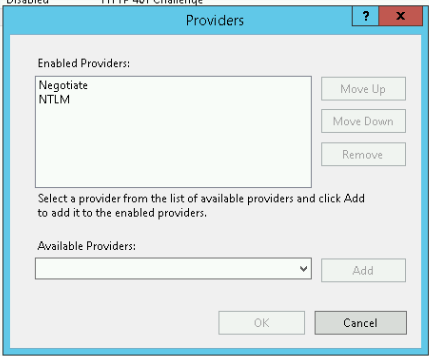
After that close the window by pressing OK.

For the next step please select your site on the left panel.
After that double click the Configuration Editor.
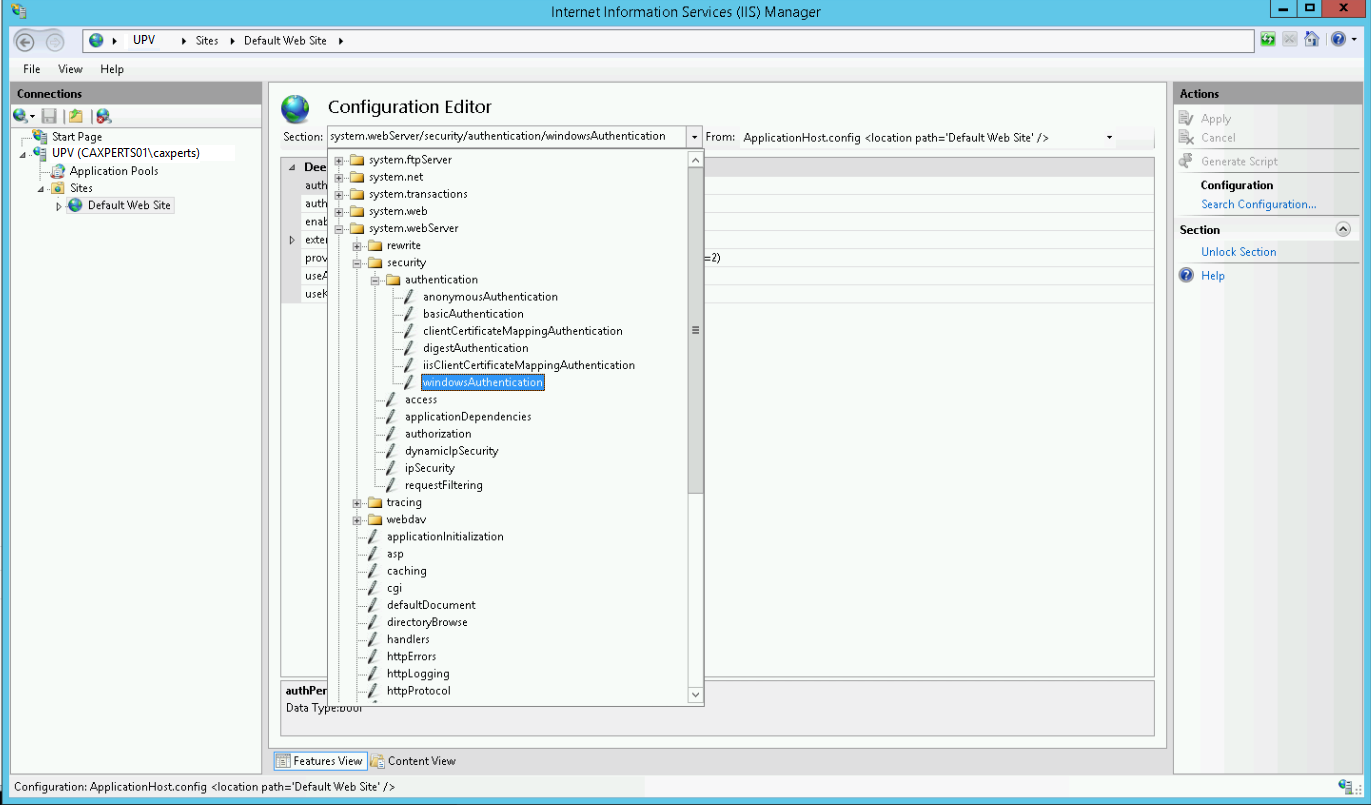
Now please select windowsAuthentication from the dropdown menu.
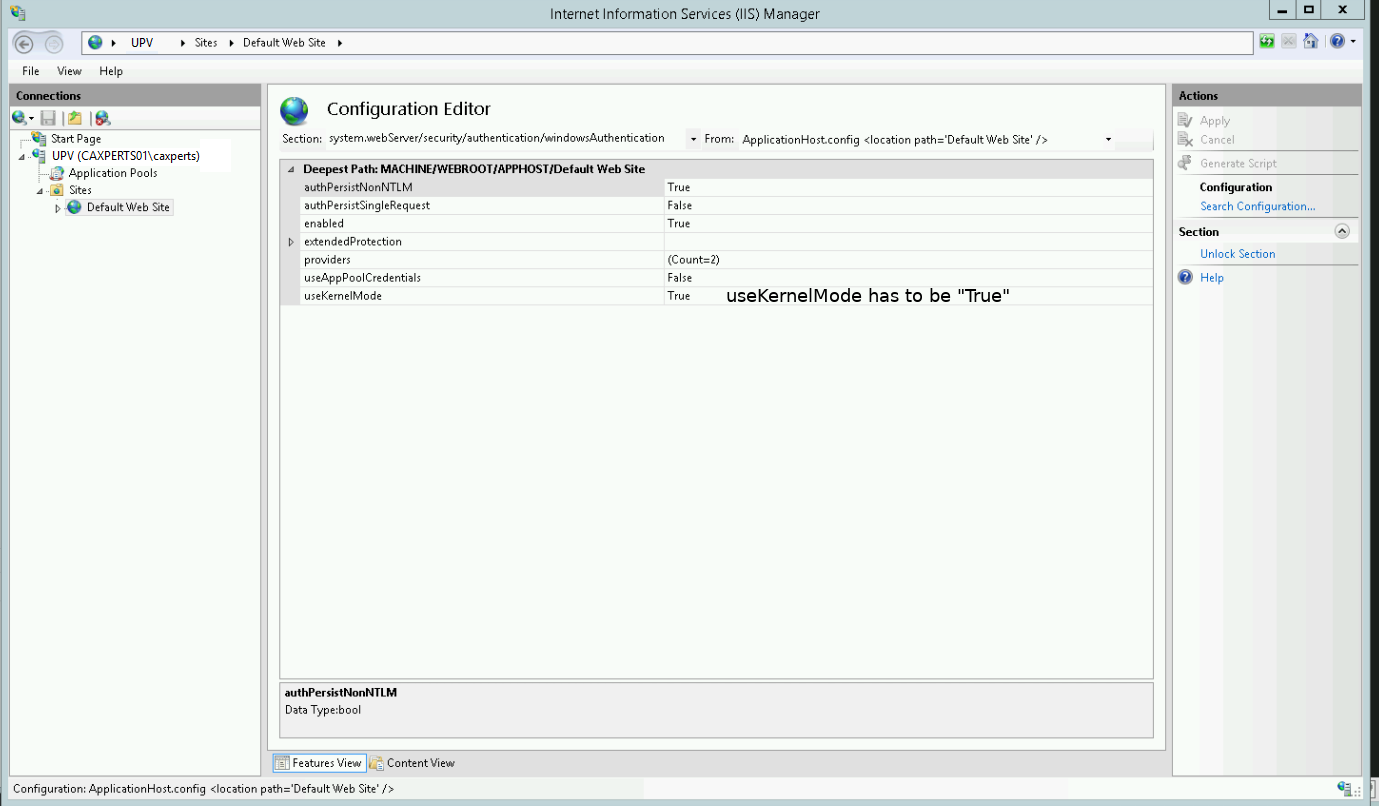
Please change “useKernelMode” to “True” and save the settings by pressing “Apply” button in the upper right corner.
Finally, please restart your IIS.
Configure SPNs
In our example we imagine the following scenario
| Hostname | Domain | FQDN hostname |
|---|---|---|
| UPV | caxperts01 | UPV.caxperts01 |
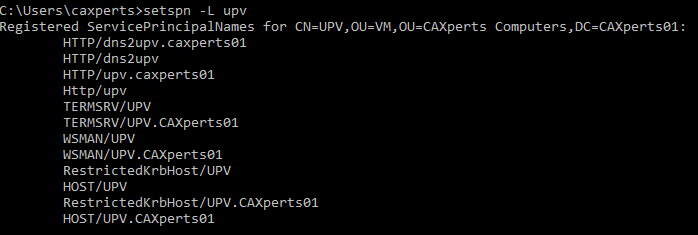
Open a console and type hostname in order to see the hostname of your machine.
Now type the following to receive a list of all SPNs registered for your machine
setspn -L yourMachineName
You now have to add a HOST and a http SPN for the address of your UPV environment which has to equal the hostname. To do this type the following commands:
setspn -a HOST/yourHostName yourMachineName
setspn -a http/yourHostName yourMachineName
Check if the SPNs were added successfully by typing
setspn -L yourMachineName
If your hostname contains a port (e.g. “nadi-ts.test.ad:81/wordpress”) do not add the port to the SPNs. This is only required for older environments up to Windows 7 and Windows Server 2008.
Enable status information on authenticated models
When using authentication methods that require user input, showing the models status information needs special treatment:
Exclude the “projectInfo.bytes” file from the authentication
Add a new empty file called “authenticationCheck.bytes”
It is required by the viewer to specify the used authentication methods for the full model.